Height map generator: image to grayscale height PNG
This free height map generator turns one texture or photo into an 8-bit or 16-bit grayscale PNG in your browser. Shape the tones, compare before and after, then download at source resolution, up to 20 megapixels. Your image stays on your device.
Choose an image to see your grayscale preview.
What this height map generator makes
A height map is a grayscale image where brightness represents surface height: black is low, white is high, and gray sits between them. This tool makes an image to height map conversion by calculating brightness from source pixels, then applying the controls you choose. The result has one grayscale channel with no transparency, rather than three channels of surface directions.
An 8-bit grayscale height map offers 256 possible levels, numbered 0 through 255. A 16-bit file offers 65,536 levels, numbered 0 through 65,535. Both downloads contain the same interpreted surface, with different rounding precision. More levels can retain small differences created by weighting and filtering; they do not add missing photographic detail or establish accurate geometry.
This page converts image brightness only; it does not provide real-world terrain, maps, elevation data, or city or game-terrain generation.
Examples
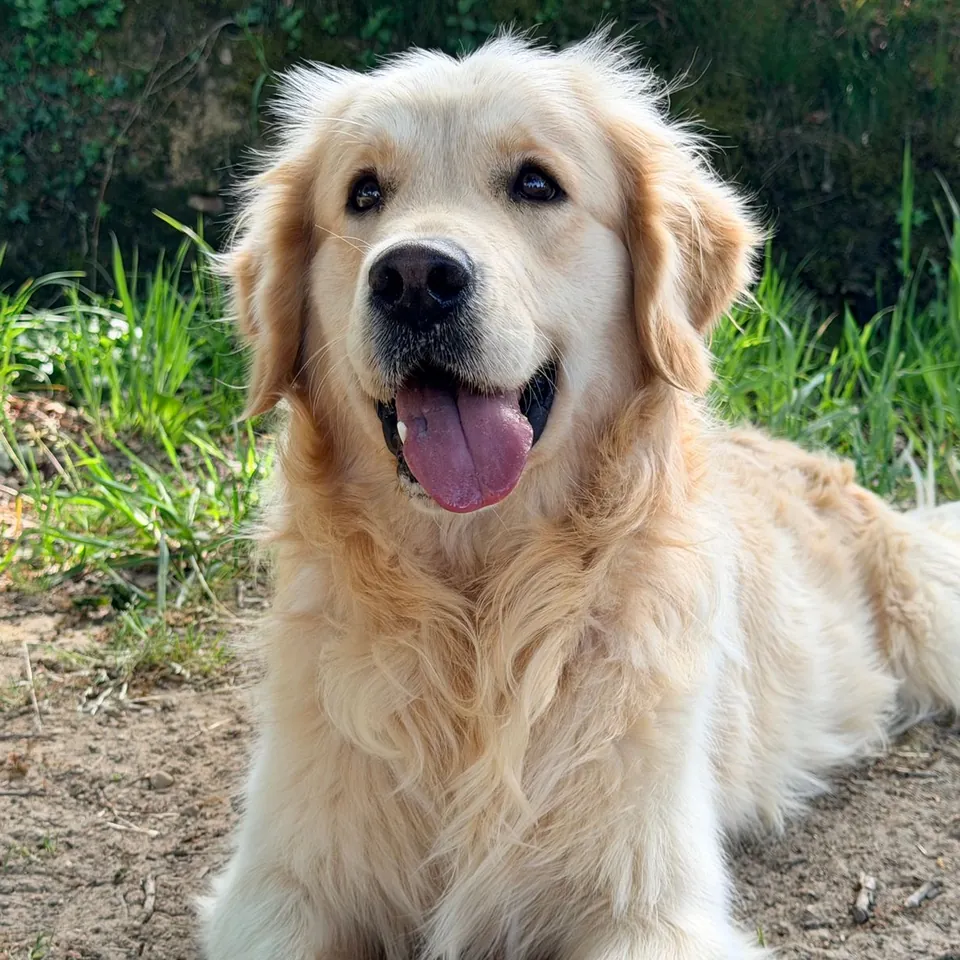
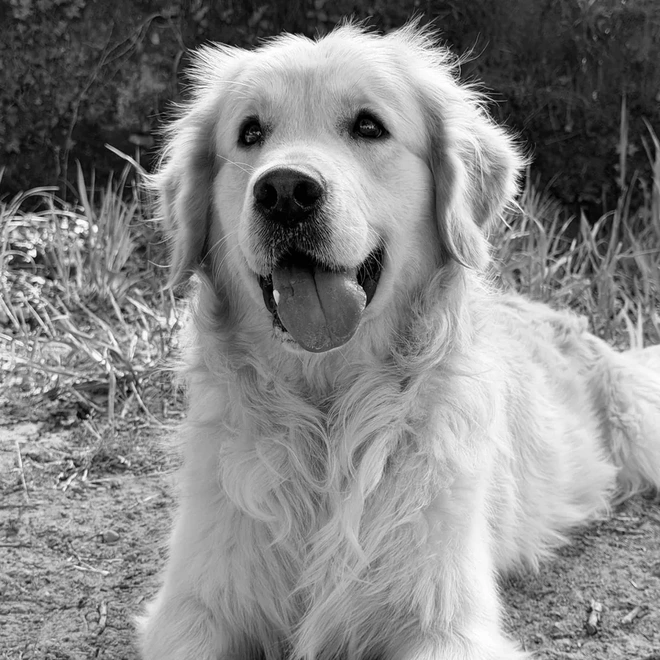
Use the height map generator in 4 steps
Choose 1 JPG, PNG or WebP texture or photo, at most 20,000,000 bytes (20 MB) and 20,000,000 decoded pixels (20 MP). Larger images are rejected rather than resized.
Pick weighted RGB, equal RGB average, or 1 color channel. Start with brightness 0%, contrast 1×, black point 0, white point 255 and gamma 1.
Adjust brightness from −100% to 100%, contrast from 0 to 3×, gamma from 0.1 to 3, and smoothing from 0 to 8 pixels. Optionally remove broad lighting with amount 0–1 and radius 1–128 pixels, invert height, or wrap edges.
Switch Before and After to compare the image and grayscale result. Download 8-bit or 16-bit PNG at the decoded source dimensions. Save before leaving: closing or refreshing the tab clears this working result.
Choose which image tones become height
Weighted RGB uses red × 0.2126 + green × 0.7152 + blue × 0.0722 on decoded color values. Green contributes most; blue contributes least. Equal RGB average gives each channel one third of the weight. These are brightness formulas for this conversion, not a physical measurement of the photographed surface. Changing the choice can change the relative height of differently colored areas.
Red, green and blue modes use just that channel. Try a single channel when colored paint hides a useful pattern in the combined brightness. For an existing grayscale source, all three channels match, so these choices usually give the same result. Transparent areas are composited over white before filtering. Cutout borders can therefore become high areas, so inspect them before using the map.
Set levels, brightness, contrast and gamma
Black point ranges from 0 to 254; white point ranges from 1 to 255. The white point always stays at least 1 above the black point. Values at or below black become 0; values at or above white become 1. Values between them are stretched across that interval. Raising black or lowering white can reveal a narrow texture range, but it also clips extremes.
Brightness adds −1 to +1 to the normalized height, shown as −100% to 100%. Contrast scales the distance from middle gray by 0–3, then brightness is added and the result is clipped to 0–1. At contrast 0 and brightness 0, everything becomes middle gray. Start near 1× when you want to retain gradual changes rather than turn broad areas into flat black or white.
Gamma applies height raised to the power of 1 divided by gamma. The neutral value is 1; higher values lift midtones and lower values darken them. Invert is applied last and changes height to 1 minus height. Use it when dark features should be raised. None of these controls assigns millimeters, cutting depth or physical displacement distance; that scale belongs in the tool that uses your file.
Smooth grain and reduce broad lighting
Smoothing uses a separable box average with radius 0–8 source pixels. Radius 0 leaves the field unsmoothed; radius 1 averages a 3 by 3 neighborhood. Larger radii reduce small variations and soften edges. The screen preview is reduced to a maximum 840-pixel long edge, so a one-pixel change may be easier to inspect in the downloaded image at full size.
Remove broad lighting blends the original brightness toward a centered high-pass field: 0.5 plus original brightness minus its blurred version. Amount 0 disables it; amount 1 uses only that field. Lighting radius ranges from 1 to 128 source pixels, default 32. It can reduce a broad brightness gradient while retaining local texture, but cannot reliably separate shadows from surface shape. Strong settings can also flatten meaningful large features.
Filtering runs in this order: luminance, broad-lighting removal, smoothing, levels, contrast and brightness, gamma, then inversion. Tileable filtering uses opposite-edge samples for both blur operations. It helps process an already repeating texture; it does not make mismatched borders seamless. With wrapping off, filtering repeats the nearest border pixel. Try the result as a repeated tile before relying on it.
Use a displacement map from an image
For 3D displacement or bump work, import the grayscale PNG as height data and set the height range in your material or geometry settings. The image describes relative heights only. A displacement setup can move geometry if the receiving tool supports it; a bump setup changes shading. Check which bit depth and height direction your workflow expects before choosing a download.
For laser engraving, CNC relief planning, or 3D-print lithophane-style relief, use the file as a tonal starting point. The receiving workflow must determine depth, thickness, toolpaths and machine settings. This page exports pixels only, with no mesh, physical dimensions, cutting instructions or toolpaths. Test a small area in your own workflow, especially when shadows or reflections are prominent.
Need a normal map from the same texture? Download the height PNG, open the linked normal map generator, and select that file locally using its existing height-map input mode. This takes a second file selection and sends no image to a server. Height stores scalar levels; normal maps store directions, so the two outputs serve different inputs in a material workflow.
Privacy, source resolution and honest limits
This height map generator online runs decoding in your browser and filtering and PNG encoding in a background worker. It requires no account or payment. Both downloads preserve the decoded width and height under the 20 MP cap; larger files are refused without automatic reduction. A calculation stops after 60 seconds, and Cancel lets you stop sooner. Changing a setting invalidates the old download until the new preview is ready.
A photo’s brightness is not true depth. A black painted patch can become a pit, a highlight can become a ridge, and distant objects do not automatically become lower. Flat lighting and deliberately prepared texture images give you more control. A 16-bit export retains more numerical precision after filtering, but browser decoding supplies 8-bit color pixels here; it does not preserve a source’s original high-bit-depth data.
Large images need more memory even when the file is small. On a phone, start with a smaller texture if decoding or processing fails. The preview is a grayscale image rather than a shaded surface simulation. Keep the original, use images you have rights to edit, and review the result where it will be used. The tool does not save a recoverable project or grant rights to the source.
More free GIF and photo tools
Height map generator questions
Is this height map generator free?
Yes. Supported files can be processed and downloaded at both bit depths for free, without an account, payment or watermark. All height controls are available in the browser.
Does my photo leave this device?
No. File decoding, height computation, preview and PNG creation happen locally in this tab. The tool has no upload or processing endpoint; download your result before closing the page.
Should I choose 8-bit or 16-bit PNG?
Choose the bit depth your receiving workflow supports. Eight-bit grayscale has 256 possible values; 16-bit has 65,536. Sixteen-bit reduces rounding of computed heights, but does not recover true depth or detail missing from the source.
Can I make an accurate height map from a photo?
No. This conversion treats brightness as height. Painted color, lighting and reflections affect the result, so a height map from image brightness is an interpretation rather than a measured surface.
Does this generate terrain or elevation data?
No. It converts your image into relative grayscale heights only. There is no geographic lookup, elevation dataset, location search or terrain generation.
Will tileable filtering make my photograph seamless?
No. It wraps filter samples across opposite borders. Use it for an existing tile and check the repeated output; it cannot repair different objects or colors at opposite edges.
Why is my exported height map flat or clipped?
The source or tone settings can remove height variation. Reset to black 0, white 255, contrast 1, brightness 0 and gamma 1, then add changes gradually. Broad-lighting removal can also suppress large features.
Can this PNG become a finished engraving or printable object?
Only with further preparation in a suitable workflow. The export contains grayscale pixels, without a mesh, toolpath, material thickness or machine settings. Physical output needs those decisions and a checked conversion outside this page.